В статье поясняется, что это за команда Dism /Online /Cleanup-Image /RestoreHealth, для каких целей она применяется, и как ею пользоваться.
SFC /scannow: Проверка и восстановление системных файлов Windows
Утилиту DISM для восстановления Windows обычно рекомендуется использовать после утилиты проверки целостности системных файлов SFC (System File Checker). Команда sfc /scannow сканирует защищенные системные файлы Windows, и, если они отсутствуют или повреждены, попробует восстановить их оригинальные копии из хранилища системных компонентов Windows (каталог C:WindowsWinSxS).
Если команда sfc /scannow возвращает ошибку “Программа защиты ресурсов Windows обнаружила повреждённые файлы, но не может восстановить некоторые из них / Windows Resource Protection found corrupt files but was unable to fix some of them”, скорее всего утилита не смогла получить необходимые файла из хранилища компонентов (образа) Windows.
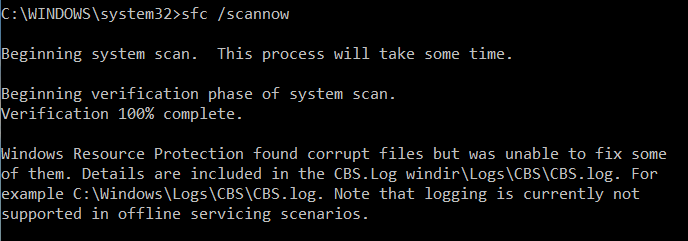
В этом случае вам нужно попробовать восстановить хранилище компонентов (ваш образ Windows) с помощью DISM.
После восстановления образа вы можете повторно использовать утилиту SFC для восстановления системных файлов.
Источник: http://winitpro.ru/index.php/2019/07/08/dism-cleanup-image-restorehealth/
How to use DISM to repair image of Windows 10
The DISM command tool for Windows 10 comes with three options to repair an image, including «CheckHealth,» «ScanHealth,» and «RestoreHealth,» which you want to run in order. Depending on the severity of the issue, you can also use the «RestoreHealth» option to fix the locally available image using different source files.
DISM command with CheckHealth option
The CheckHealth option with the Deployment Image Servicing and Management command tool allows you quickly determine if there are any corruptions inside the local Windows 10 image. However, the option does not perform any repairs.
To check the Windows 10 image for issues with DISM, use these steps:
- Open Start.
- Search for Command Prompt, right-click the top result, and select the Run as administrator option.
-
Type the following command to perform a quick check and press Enter:
DISM /Online /Cleanup-Image /CheckHealth
 Source: Windows Central
Once you complete the steps, DISM will run and verify any data corruption that may require fixing.
DISM command with ScanHealth option
The ScanHealth option performs a more advanced scan to determine if the OS image has any problems.
To check problems with the ScanHealth option, use these steps:
- Open Start.
- Search for Command Prompt, right-click the top result, and select the Run as administrator option.
-
Type the following command to perform an advanced DISM scan and press Enter:
DISM /Online /Cleanup-Image /ScanHealth
 Source: Windows Central
After you complete the steps, the advanced scan may take several minutes to check and determine whether the Windows 10 image needs repairing.
DISM command with RestoreHealth option
If there are problems with the system image, you can use DISM with the RestoreHealth option to scan and repair common issues automatically.
To repair Windows 10 image problems with the DISM command tool, use these steps:
- Open Start.
- Search for Command Prompt, right-click the top result, and select the Run as administrator option.
-
Type the following command to repair the Windows 10 image and press Enter:
DISM /Online /Cleanup-Image /RestoreHealth
 Source: Windows Central
Quick note: If the command appears stuck at any point, this is normal behavior. After a few minutes, the process will complete successfully.
Once you complete the steps, the Deployment Image Servicing and Management tool will connect to Windows Update online to download and replace damaged files (if applicable).
Fix problems with DISM using install.wim image
The DISM command typically completes without issues, but if there are problems replacing the damaged files or you are not connected to the internet, you will need to provide another image using the Source option to complete the task. Usually, you can use an «install.wim» or «install.esd» file from another computer, bootable install media, or Windows 10 ISO file. However, you have to make sure that the files match the version, edition, and language of the version of Windows 10 you are trying to fix.
Download Windows 10 ISO file
If you need to use a different source for the files, it is recommended to use the Media Creation Tool to download a fresh copy of Windows 10.
To download the ISO file of Windows 10, use these steps:
- Open this Microsoft support website.
- Click the Download tool now button.
- Double-click the MediaCreationToolxxxx.exe file to launch the setup.
- Click the Accept button to agree to the terms.
-
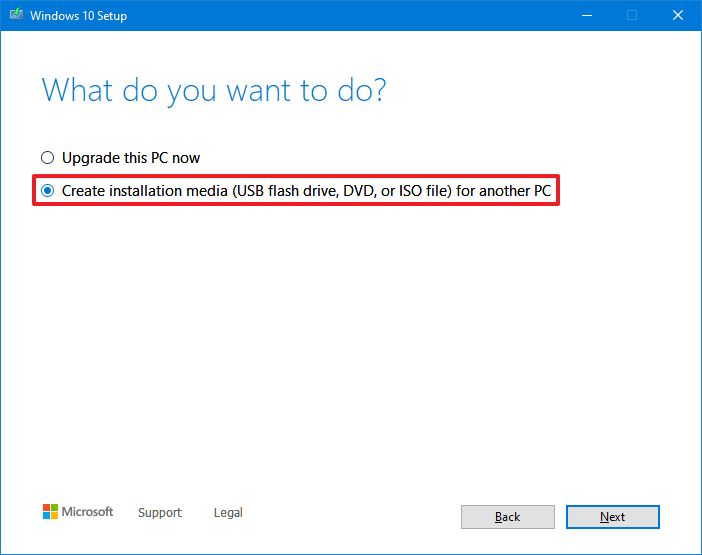
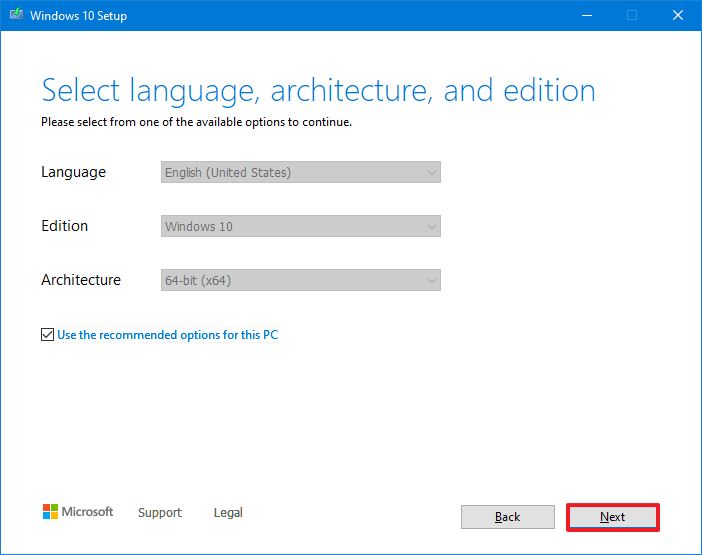
Select the Create installation media (USB flash drive, DVD, or ISO file) for another PC option.
 Source: Windows Central
 - Click the Next button.
-
Click the Next button again.
 Source: Windows Central
 -
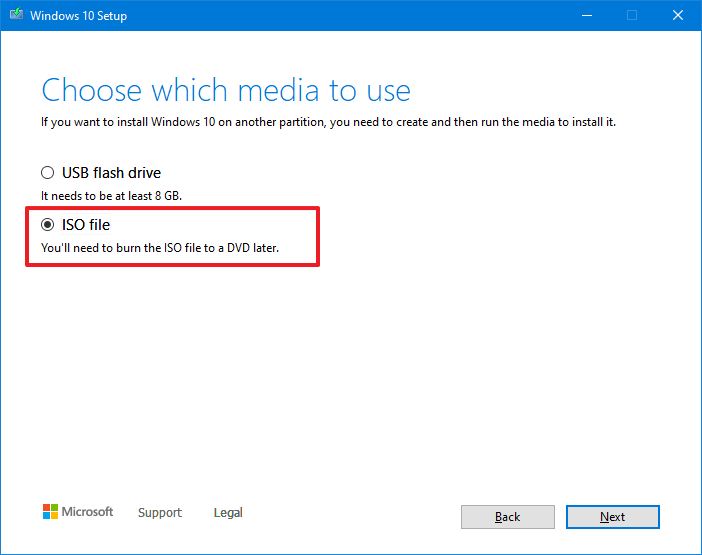
Select the ISO file option.
 Source: Windows Central
 - Click the Next button.
- Select the destination to store the Windows 10 ISO file.
- Click the Save button.
-
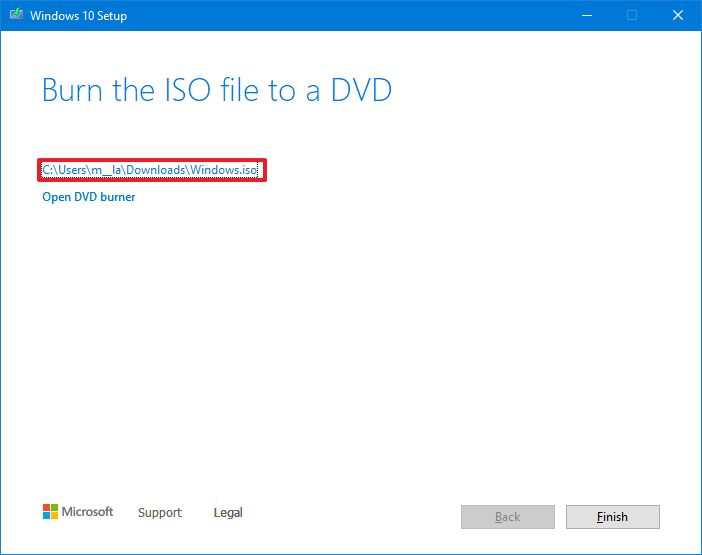
Click the link to open the file location with File Explorer.
 Source: Windows Central
 - Click the Finish button.
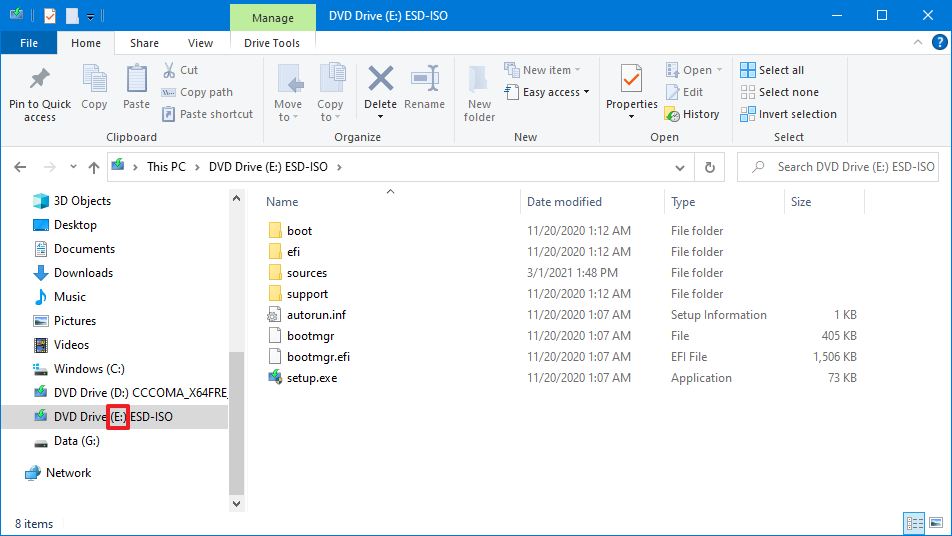
- Double-click the Windows.iso file to mount the image.
-
Under the «This PC» section, confirm the drive letter for the mount in the left pane.
 Source: Windows Central
After you complete the steps, you can continue with the DISM tool using the «Source» option to repair the local image of Windows 10.
Fix Windows 10 recovery image
To run Deployment Image Servicing and Management tool with an alternate source (install.wim) image, use these steps:
- Open Start.
- Search for Command Prompt, right-click the top result, and select the Run as administrator option.
-
Type the following command to repair the Windows 10 image and press Enter:
DISM /Online /Cleanup-Image /RestoreHealth /Source:E:Sourcesinstall.wim
 Source: Windows Central
In the command, replace «F» with the drive letter corresponding to the ISO mount point in File Explorer.
-
(Optional) Type the following command to limit the use of Windows Update and press Enter:
DISM /Online /Cleanup-Image /RestoreHealth /Source:ESourcesinstall.wim /LimitAccess
-
(Optional) Type the following variant of the previous command to accomplish the same task and press Enter:
DISM /Online /Cleanup-Image /RestoreHealth /Source:wim:E:Sourcesinstall.wim:1 /LimitAccess
In the command, change F:Sources, for the path to the «install.wim» file.
Once you complete the steps, the command will scan and repair the most common problems using the «install.wim» file you specified as the alternative source.
Fix problems with DISM using ESD image
If you have an encrypted «install.esd» image, you can also use it to repair the damaged files on Windows 10.
To use DISM with an «install.esd» image file as the source to repair Windows 10, use these steps:
- Open Start.
- Search for Command Prompt, right-click the top result, and select the Run as administrator option.
-
Type the following command to repair the image with an «install.esd» file and press Enter:
DISM /Online /Cleanup-Image /RestoreHealth /Source:C:ESDWindowssourcesinstall.esd
 Source: Windows Central
In the command, change C:ESDWindowssources with the path that corresponds to the location of the «.esd» file (if applicable).
-
(Optional) Type the following command to limit the use of Windows Update and press Enter:
DISM /Online /Cleanup-Image /RestoreHealth /Source:C:ESDWindowssourcesinstall.esd /LimitAccess
-
(Optional) Type the following variant of the previous command to accomplish the same task and press Enter:
DISM /Online /Cleanup-Image /RestoreHealth /Source:esd:C:ESDWindowssourcesinstall.esd:1 /LimitAccess
-
(Optional) Type the following command to use an install.esd file located in another drive and press Enter:
DISM /Online /Cleanup-Image /RestoreHealth /Source:E:Sourcesinstall.esd
In the command, replace F:Sources with the path to the location of the «install.esd» file.
After you complete the steps, DISM will repair the damaged files using the files included in the «install.esd» image.
Источник: http://windowscentral.com/how-use-dism-command-line-utility-repair-windows-10-image
Кнопка Пуск
Это самый простой путь. Вызвав нажатием клавиш Win+X служебное меню Пуск, выберите в нём опцию «Командная строка (администратор)».
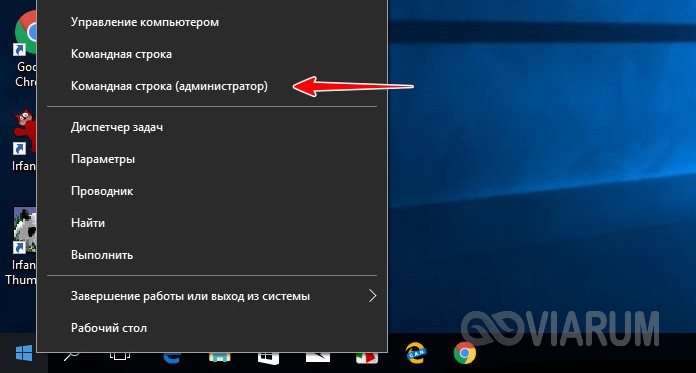
Стоит, правда, отметить, что в новых релизах «десятки» опции вызова классической командной строки заменены опциями вызова утилиты PowerShell, поэтому вам необходимо зайти в параметры Панели задач и включить замену PowerShell командной строкой.

Источник: http://viarum.ru/kak-otkryit-cmd-win-10/
Windows 8.1 или Windows 8
Проведите пальцем от правого края экрана к центру и коснитесь кнопки Поиск. Либо, если вы используете мышь, переместите указатель в правый нижний угол экрана и щелкните кнопку Поиск. Введите запрос Командная строка в поле Поиск, щелкните правой кнопкой мыши элемент Командная строка, затем выберите команду Запуск от имени администратора. Если система запросит пароль администратора или подтверждение, введите пароль или нажмите кнопку Разрешить.
Источник: http://support.microsoft.com/ru-ru/topic/использование-средства-проверки-системных-файлов-для-восстановления-отсутствующих-или-поврежденных-системных-файлов-79aa86cb-ca52-166a-92a3-966e85d4094e
Привычное в необычном!
Более того, включить командную строку с правами администратора удобно, используя сочетание горячих клавиш.
- Одновременное нажатие [Win]+ [X] с desktop’a (раб.стол) ускорит переход в вышеописанное меню.

Источник: http://windows10x.ru/kak-otkryt-komandnuyu-stroku-ot-imeni-administratora-v-windows-10/
Исправляем ошибку на ОС Windows 7 и 2008R2
Однако, в операционной системе Windows 7 и Server 2008R2, компания Microsoft выпустила обновление KB2966583, которое расширяет возможности утилиты dsim.exe. И позволяет нам избавиться от ошибки 87.
Само обновление можно скачать с официального сайта Microsoft — https://support.microsoft.com/ru-ru/help/2966583/
Обновление имеет зависимость битности операционной системы, при установке будьте внимательны.
Источник: http://yakadr.ru/windows/oshibki/error-87-dism-online-cleanup-image-restorehealth.html
Как проверить целостность системных файлов Windows 10 — видео
Также предлагаю ознакомиться с видео, где использование основных команд проверки целостности показано наглядно с некоторыми пояснениями.
Источник: http://remontka.pro/files-integrity-windows-10/
Устранение проблем с DISM с помощью образа install.wim
Команда DISM обычно выполняется без проблем, но если есть проблемы с заменой повреждённых файлов или вы не подключены к интернету, вам нужно будет предоставить другой образ с помощью параметра «Источник». Обычно вы можете использовать файл install.wim или install.esd с другого компьютера, загрузочный установочный носитель или ISO-файл Windows 10. Однако убедитесь, что файлы соответствуют версии, редакции и языку версии Windows 10, которую вы пытаетесь исправить.
Источник: http://msreview.net/windows-10/3813-kak-ispolzovat-instrument-dism-dlja-vosstanovlenija-obraza-windows-10.html
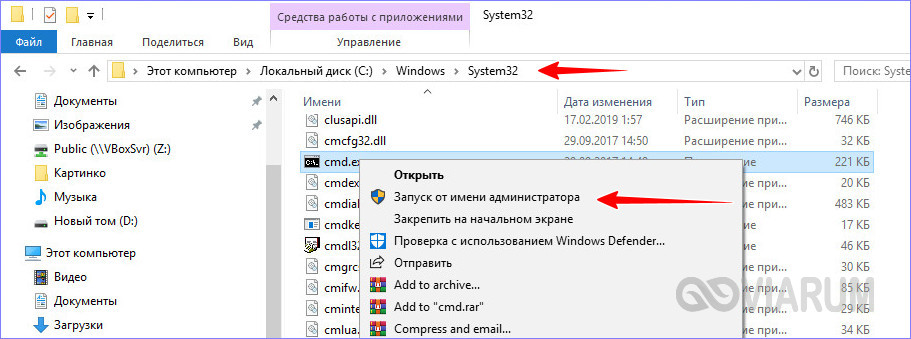
Прямой запуск cmd.exe
Еще один способ открыть командную строку в Windows 10 – запустить ее исполняемый файл напрямую. Для этого вам нужно зайти в системный каталог System32, найти там файл cmd.exe, кликнуть по нему ПКМ и выбрать в меню нужную строку.
Источник: http://viarum.ru/kak-otkryit-cmd-win-10/
Почему же существует такое разграничение прав?
Разграничение полномочий позаимствовано с nix.систем, в которых изначально было введено понятие «root», то есть «Суперпользователь» (в данном случае – «Супер Администратор»). Учётная запись root была наделена наивысшими правами в системе и все программы, приложения и службы с расширением bat, vbs, cmd запускались без проблем.
В Windows 7 учётная запись root также существует. Её можно активировать следующим образом. Жмём «Пуск», правой кнопкой нажимаем на «Компьютер» и выбираем «Управление».
В левом меню выбираем «Локальные пользователи и группы» и далее «Пользователи».
Выбираем учётную запись администратора и открываем её двойным щелчком. Снимаем отметку с пункта «Отключить учётную запись».
Перезагружаем ПК, чтобы активировать учётную запись «Супер Администратора».
Стоит предупредить, что включение этой записи снижает безопасность компьютера. При заражении системы вирусом, мошенники получат полный доступ ко всем службам вашей системы. Поэтому, прежде чем активировать «Супер Администратора», стоит поискать иные способы запуска программы или приложения.
Источник: http://msconfig.ru/kak-otkryt-komandnuyu-stroku-s-povyshennymi-pravami/